
Web Design :: Lessons :: Tables
Adding Tables
Tables are defined with the <table> tag.
A table is divided into rows (with the <tr> tag), and each row is divided into data cells (with the <td> tag). td stands for "table data," and holds the content of a data cell. A <td> tag can contain text, links, images, lists, forms, other tables, etc.
Tables can be used just as you use them in Microsoft Word. You can use tables for holding rows and columns of data. You can also use tables to layout a web page, but that method of page layout is out-of-date so you should use divs and CSS instead. Tables can be tricky to make even using Dreamweaver. For an alternative, try the HTML Table Generator that will create the HTML and CSS code for you.
- Open your Lessons site.
- Create a new page called "tables.html".
- Go to Insert>Table.
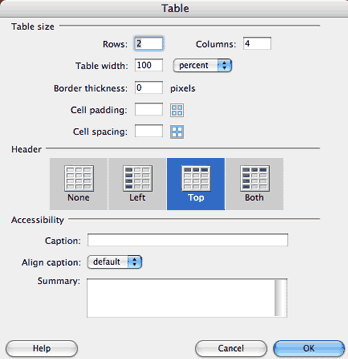
The table window has a number of options you can change:
- Rows, Columns: The number of rows and columns the table contains. Rows are horizontal while columns are vertical.
- Table Width: How much space the table takes up within its container. This can be set to a percent or a certain number of pixels.
- Border Thickness: How thick the border of the table is in pixels. Setting it to 0 will remove the border.
- Cell Padding: Space inside a table cell between the cell's content and its border.
- Cell Spacing: Space in between different cells.
- Header: Creating a header will center and bold all content in the header cells.
Modifying Tables
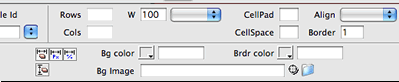
After you have added a table there are a number of ways to modify it. The first is the Properties Pane at the bottom of the screen.
You can use CSS to change the look of the table including the border, background, and font color.
Finally, the Modify>Table menu option has a few more table options. A major option available in this menu is the ability to delete rows and columns. You can also merge two or more cells into a single cell.


