
Web Design :: Lessons :: Images in Dreamweaver
Adding Images
The <img> tag defines an image in an HTML page.
The <img> tag has two required attributes: src and alt.
Images are an important part of the internet, and Dreamweaver makes it pretty easy to add them to your web page.
- Open your "Lessons" website.
- Download an image you want to add to your site.
- Click on the location on your page where you want to add the image.
- Go to Insert>Image to add your image.
- If a prompt asks you if you want to copy the image to your site, choose "Yes."
After your image has been added, you're not done. You have to set the alt attribute for every image. An alt attribute is a short description of the image that makes the image more accessible for search engines and people with visual impairments.
- Right-click on your image and choose "Properties."
- Move the Properties pane to the bottom of the screen.
- Select your new image.
- Type a description of your image in the "Alt Attribute" section of the Properties pane.

Positioning
The float property specifies whether or not a box (an element) should float.
One way to move images or other HTML elements is by using the float CSS property. This can be set using a class which will send the element to the left or right.
The float property is useful in a lot of instances, but sometimes we want to have more control over where an image is positioned. In these cases we will use the positioning property of the images. Positioning determines how an element on a web page is placed on the page. There are five possible position values that we can use.
-
Property Definition from W3 Schools:Absolute: The element is positioned relative to its container.
The position property specifies the type of positioning method used for an element (static, relative, absolute or fixed). - Fixed: The element is positioned relative to the browser window.
- Relative: The element is positioned relative to its normal position in the document flow.
- Static: The element has no positioning.
- Inherit: The positioning is taken from the container of the element.
To understand the different position values we first need to understand how elements are normally placed in the flow of a web page. In the normal flow of a web page elements flow from left to right. This is only broken up when they reach the edge of the browser window or an object, such as a paragraph, causes elements to move down.
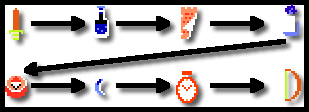
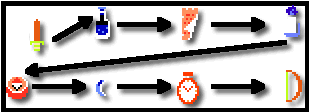
Relative positioning moves an element relative to its normal flow in the document. If we decide to change the positioning of the sword to be 20 pixels left and 10 pixels down it would look like the following:
Absolute positioning takes an element out of the document flow entirely and positions it relative to its container. We will discuss containers in a moment, but for now assume elements are positioned relative to the entire page. This means every other element will move to take its place. It also means absolutely positioned elements can appear on top of other elements.
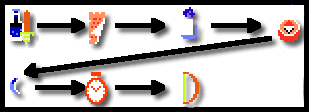
Fixed positioning is a special case of absolute positioning in which the object is positioned relative to the browser window. You can see an example of fixed position with the left-side menu of this website. In the example below the sword is positioned 20 pixels left and 10 pixels down with absolute positioning.
The z-index property specifies the stack order of an element.
An element with greater stack order is always in front of an element with a lower stack order.
So what happens if multiple absolutely-positioned elements appear on top of each other? By default the element that  appears last in the document's HTML code will be the one that appears on top, but there is a way to control this. You can use the z-index property to control where elements appear. The z-index property only has an effect on positioned elements, and a higher z-index number will appear in front of a lower z-index number. In the picture with the three colored boxes the blue box has a z-index of -25, the red box has a z-index of 0, and the green box has a value of 99. The boxes would look exactly the same if they had z-index values of 1, 2, and 3 respectively.
IDs
The id attribute specifies a unique id for an HTML element (the value must be unique within the HTML document).
The id attribute is most used to point to a style in a style sheet, and by JavaScript (via the HTML DOM) to manipulate the element with the specific id.
To use positioning on an image, we will have to create an ID for our image. An ID is a style that can only be applied once per page. You want to use IDs in situations where you have a unique style that will not be reused, such as the position and size of something. Follow these steps to assign an ID to your image:
- Click on the "+" next to Selectors in the CSS Designer tab.
- Give your ID a name that starts with "#".
- Click on the "+" next to Properties.
- Add a position property and set the value to "absolute."
Now that you've create the ID, you need to assign it to your image. This process works similarly to assigning classes to objects.
- Select your image in Design or Code view.
- At the bottom of the screen, right-click on the <img> tag.
- Choose "Set ID" and select the ID you created.
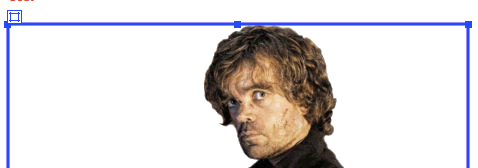
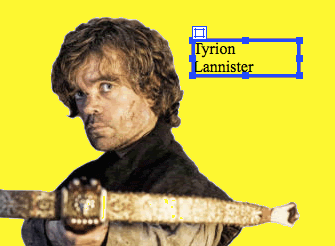
Once you've assigned an absolutely ID to an object, a blue border will appear around the image as well as a white box in the upper-left. You can move the image using the border or the white box.
Containers
Now that you know a bit of HTML you can better understand the concept of containers. First, we will take a look at the HTML code of a page in Dreamweaver.
<!DOCTYPE html>
<html>
    <head>
        <meta charset="UTF-8">
        <title>Untitled Document</title>
        <style type="text/css">
        <!--
            #pic3 {
                position: absolute;
                z-index: 1;
            }
            #pic1 {
                position: absolute;
            }
            #pic2 {
                position: absolute;
                z-index: 2;
                left: 651px;
                top: 227px;
            }
        -->
        </style>
    </head>

    <body>
        <img src="images/goCubs.png" width="207" height="210" id="pic1">
        <img src="images/daBears.png" width="408" height="402" id="pic2">
        <img src="images/hereComeTheHawks.png" width="600" height="375" id="pic3">
    </body>
</html>
The <html> tag tells the browser that this is an HTML document.
The <html> tag represents the root of an HTML document.
The <html> tag is the container for all other HTML elements (except for the <!DOCTYPE> tag).
Your code will be different from the code above, but the main elements should be the same. You should see an  <html> tag as well as a <body> tag. The <html> tag is the parent container within the document. The parent container is the element that contains all the other elements. Another example of a parent container would be the universe since it contains all the galaxies and other objects in space.
The <body> tag defines the document's body.
The <body> tag contains all the contents of an HTML document, such as text, hyperlinks, images, tables, lists, etc.
The <body> tag is another important container since it contains most of the elements that appear on your page. You should notice that all of the images you added to your page are within the <body> tag.
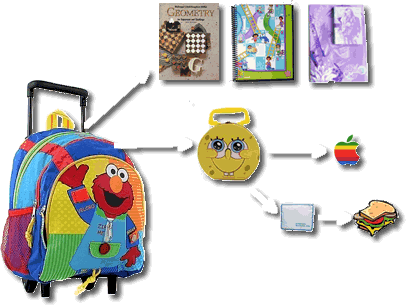
The concept of containers is important so before we move on let's think of an analogy. Let's say you are going to head to school and you are getting everything ready. You are going to bring a sandwich and apple for lunch, two notebooks, your math textbook, and your backpack which has two compartments. When you leave for school would you carry all of these things separately? Most likely you would put the sandwich in a plastic bag and put the sandwich and apple in another container such as a lunch box. You would then put your notebooks and math book in one compartment of your backpack while you put the lunch box in another compartment. Next we will see how to apply this concept to web design.
The <div> tag defines a division or a section in an HTML document.
The <div> tag is used to group block-elements to format them with CSS.
Div Tags
A div, or division, is simply a container in which you can put any HTML content. Think of it like a text box in a word processing program except you can put more than just text in it. Divs are a very important element when designing your pages since they can be combined with positioning to layout your page exactly the way you want. Follow the steps below to add a div to your page.
- Click on the point of your page where you want to insert a div.
- Go to Insert>Div.
- Click "OK" to add the div to your page.
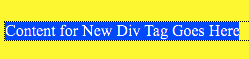
 You can choose to create a class or an ID for your div ahead of time, but we're going to create an ID for our div later. You should now notice a box has appeared with some default text.
- Replace the default text in the div.
- Go to the Selectors section of the CSS Designer tab.
- Create a new ID for your div starting with "#".
- Add a position property to your ID and set the value to "absolute."
- Select your div and then right-click on the <div> tag in the lower-left of Dreamweaver.
- Choose "Set ID" and select the ID you created.
- Move the div where you want.
Background Colors
Dreamweaver makes it easy to add background colors to your pages. However, you need to make sure that the color of the font isn't too close to the color of the background so your text is still legible.
- Go to the CSS Designer tab.
- Hit the "+" next to Selectors.
- Create a new selector for the body.
- Create a property called "background-color."
- Assign the background color a value starting with "#." You can use a color picker to find the color you want.
You can use the same process to give a div a background color. You just need to edit the div's ID selector instead of making a new selector.


