
Computer Programming I :: Lessons :: The Visual Studio Environment
The Visual Studio Environment
While you can use a number of different programming languages to create a computer program we will be using the C# programming language in this course. C# is an object-oriented programming language created by Microsoft in 2001. Object-oriented programming will be defined later in the course, but it is a very important concept in computer programming. We will use Microsoft's Visual Studio application to write and run our programs in C#
- Open Visual Studio on your computer.
- Click on New Project... to make a new project.
- Name your project "Calculator" in the window that appears.
- Change the location to your Google Drive by clicking "Browse..." and finding your Google Drive folder.
- Under the Visual C# Section choose "Windows Forms Application."

We will never change the default selection of Windows Forms Application in this course, but if you are interested in what the other options do they are described below.
- Windows Forms Application: This is the option you will use for this course. It will design a program that looks like a normal Windows application.
- WPF Application: Windows Presentation Foundation Applications work similarly to Windows Form Applications, but they have a number of graphical enhancements and are designed for Windows Vista or above. In general, these run much slower than normal applications so if you are designing an application for Windows XP you may want to avoid it.
- Console Application: A console application uses the same code as other applications, but it does not have any visual elements. This is very useful for saving computer resources when you don't need visual elements, such as a program used to copy a group of files to a new location.
- ASP.NET and ASP.NET MVC 2 Web Application: These options will let you design an application for the web, but ASP does not normally play well with browsers other than Internet Explorer.
- Class Library: Classes are simply collections of code that perform a specific function. We will create classes in this course, but not via this option.
- Silverlight Application: Silverlight is Microsoft's answer to Adobe Flash. You can design Silverlight applications for the web using this option.
- Silverlight Class Library: Create a class for Silverlight applications.
- WCF Service Application: A Windows Communication Foundation Service Application will let you design an XML web service application.
There are a number of other application-specific options that you can try out if you're interested. The XNA Game Studio section will be used if you end up taking Computer Programming II.
The Form and Properties
There is a lot to look at when you first create an application in Visual Studio, but don't be overwhelmed. Focus on the center of the environment where you will see a form titled Form1.
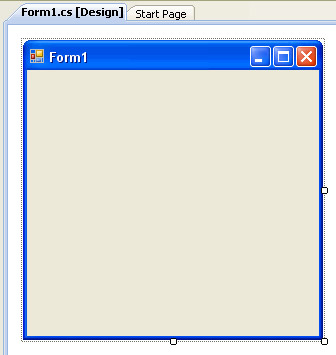
 The area above is the Form Designer where you will add buttons, menus, text, and other elements to create your applications. You will spend the beginning of nearly every project in this area setting up the look of your application.
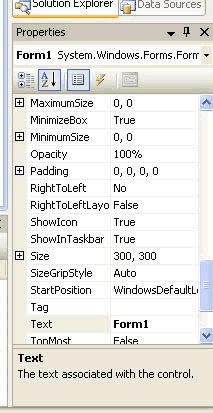
The next area we are going to look at is the Properties Window on the right side of the environment. This area changes based on what you currently have selected on the Form, but since we don't have anything added to the Form yet the properties will reflect things that can be changed about the Form itself. There are a lot of properties you can change, but for now we will only change one of them.
- If the Properties Window is not open go to View>Properties Window.
- Find the Text Property.
- Change the property from "Form1" to "Calculator" and press "Enter."
After pressing "Enter" you should see the title of your form change at the top of the Form Designer. Since we made a change to our Form it is probably a good idea to save. You will see two buttons with disk icons in the toolbar under the menu. The left button is the Save Button that will save the currently open document, in our case Form1. The right button is the Save All Button that will save everything that is open. It is good practice to use the Save All Button so you can save everything.
- Click on Save All to save your project to your network drive.
The Toolbox
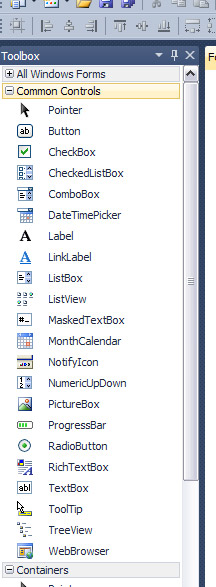 The last area we are going to look at is the Toolbox. The Toolbox contains all the controls that you can add to your projects. The Common Controls section is where you will spend most of your time since it contains controls that are used a lot. Note the pin in the upper-right of the Toolbox. Clicking the pin will lock the Toolbox in place. If you don't do this the Toolbox will disappear when you hover away from it into a tab.
- If the Toolbox isn't visible go to View>Toolbox.
- Add a text box to your Form by double-clicking it.
- Resize the new text box by pulling on the resize handles that appear.
A text box is used to accept input from the user. You can type anything into a text box and we will use them quite a lot in our projects. A text box only accepts a single line of text, but there is a property that allows you to allow it to accept multiple lines. Can you find the property?
Another way to add controls to a form is by single-clicking them. Once you do this you can click-and-drag to make them the exact size you want.
- Single-click on the button control.
- Click-and-drag to add the button to the form.
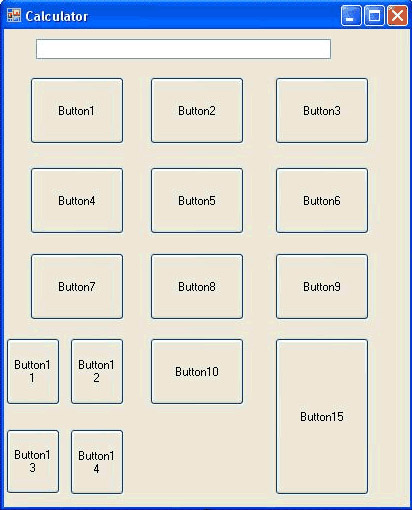
- Add more buttons to create a calculator like the one below.
Designing The Form
Now that we have the basic layout for our calculator we need to change the text property of the buttons.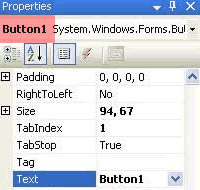
- Click on Button1.
- Look in the Properties Window and make sure the name in the upper-left has changed to Button1.
- Change the text property to "1".
- Change the text property for the rest of the buttons.
You can always look at the top of the Properties Window to see what item is currently selected. By default, the font used for all controls is Microsoft Sans Serif. This can look rather generic, though, so you may want to change the style of the text. You can do this with the font property. Hitting the plus sign next to the font property allows you to change the sub properties of the font property such as size and style.
Additionally, you change the font color using the fore color property. Clicking on this property brings up a window that allows you to choose a color. Finally, the back color property allows you to change the background color of a control. It works exactly the same as the fore color property.
Adding Pictures
You can add pictures to the background of controls using the background image property, but there are many times where you will want to have a picture all by itself on the Form. You can do this with the picture box control.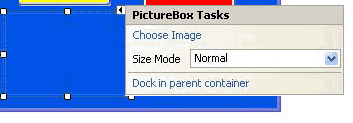
- Add a picture box to the form.
- Click on the arrow on the picture box to access its most-used properties.
- Click on Choose Image to select an image.
- Select Project Resource File.
- Click Import and select any image.
- Hit OK to add the picture to the picture box.
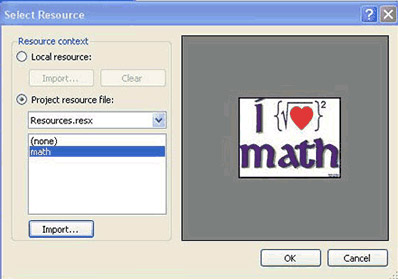
The difference between local and project resources is that project resources are automatically saved in your project's folder. Because of this it is usually best to choose project resources.
Finally, you can change the size mode property of a picture box. The different size modes are listed below:
- Normal: The image is placed in the upper-left corner of the picture box. If the image is bigger than the picture box it will be cut off. If it is smaller the extra space will be the background color of the picture box (transparent by default).
- StretchImage: The image is stretched or shrunk so it fits the picture box exactly. The image could become blurry or look obviously resized using this mode.
- AutoSize: Instead of resizing the image the picture box itself is resized so it is the same size as the image.
- CenterImage: If the image is smaller than the picture box it is placed in the center of the picture box and the edges will be the background color. If the image is larger than the picture box the edges of the picture will be cut off.
- Zoom: This is similar to StretchImage, but the image will maintain its aspect ratio so it doesn't blur.
Naming Controls
The last thing we are going to look at is naming the controls on your form. If you noticed all of our buttons are named button1, button2, etc. This isn't a big deal when we are designing the program, but when we begin to write code it can be hard to remember these names. We need to come up with a good method to name controls.
A method that was originally designed for naming elements of the code itself easily applies itself to naming controls. The method was developed by Charles Simonyi at Xerox in the 1970s and is known as Hungarian Notation. Simonyi is Hungarian and chose the name because Hungarian names are reversed compared to other European names. In Hungary the family name comes first, which is similar to how Hungarian Notation work.
Hungarian Notation works for controls by putting a 3-letter prefix that represents the control and then giving the control a name. For example, you could call the = button btnEquals. Generally, you put the prefix in all lowercase letters and the start of every new word as an uppercase letter. Below are some of the prefixes you can use in Visual Studio:
- Button: btn
- Form: frm
- Label: lbl
- Picture Box: pic
- Slider: sld
- Text Box: txt
- Timer: tmr


