Computer Programming I :: Lessons :: Minecraft While Loops
Turtles
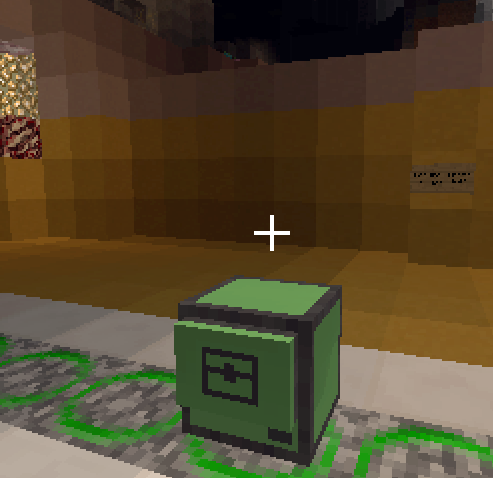
MinecraftEdu and ComputerCraft are Minecraft mods that introduced programmable turtles to Minecraft. You can program these turtles to do just about anything you could do on your own in Minecraft such as building, mining, or fighting. To interact with a turtle you must use a turtle remote. Once you interact with a turtle using the remote, you will see a window similar to the following:
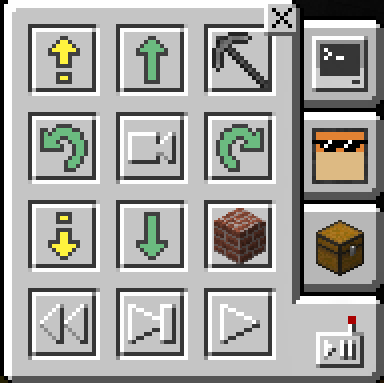
The controls above do the following:
 Move the turtle up one block
Move the turtle down one block
Move the turtle forward one block
Move the turtle backward one block
Turn the turtle to the left once
Turn the turtle to the right once
Use turtle vision to see what the turtle sees
Place a block from the currently-selected slot in front of the turtle
Undo the most recent program
Run the next line of the program
Run the entire program
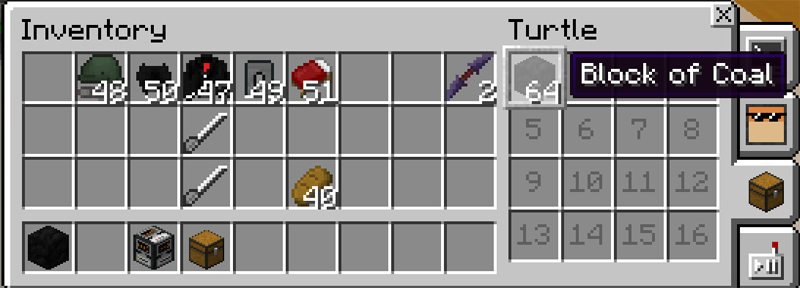
Open the turtle's inventory as seen below and transfer items from your own inventory
Customize your turtle
Open the code window to edit your turtle's program
Turtle Visual Editor
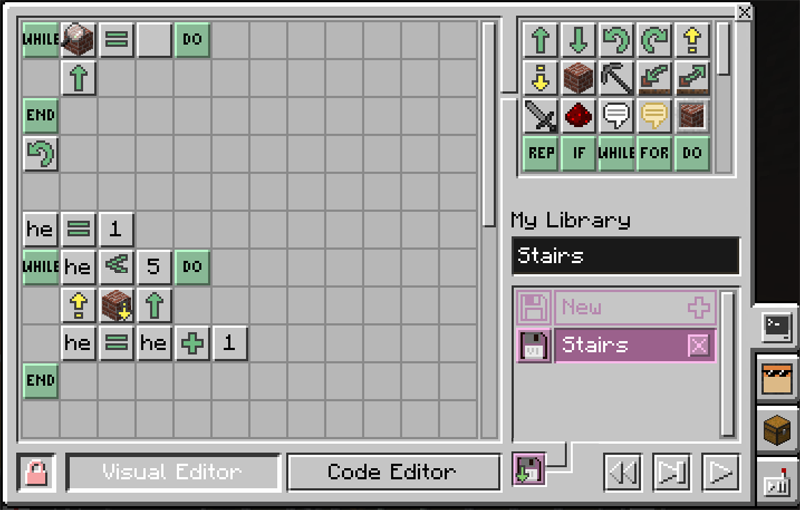
When you enter the turtle's code editor, you will enter the visual editor. You can also use the code editor to edit the actual code using the progamming language Lua, but that is beyond the scope of this class. When you open the visual editor you will see the following screen.
You will see the following areas in the visual editor:
This scrollable area contains all of the turtle commands you can use for your program. Some of the commands are things you could control manually using the turtle controls from the previous screen, but most of the commands are only available here. You can drag-and-drop these commands to add them to your program.
This area is the visual editor where you can place the commands you drag-and-drop from the turtle command window. The commands are executed from left to right and from top to bottom.
This area lets you switch between the visual editor and the code editor. It also lets you lock and unlock your turtle. By default, a turtle can only be edited by its creator. You can change it to demo mode to allow anyone to run but not edit the program. You can also unlock the turtle to allow anyone to run or edit the program.
This area lets you save your program. Once you give your program a name, you can access this program from any turtle. This is helpful for situations where you lose your current turtle or need to use your program on more than one turtle. You can also hit the disk icon to save your program to a disk that you can share with other players. When you are holding a disk, you can hold down right-click to "eat" the disk to add it to your library of programs. This area also has commands to undo, step through, and run your program.
While Loops
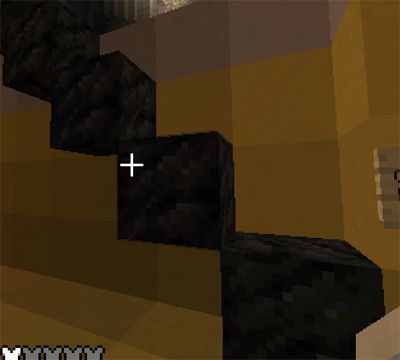
Loops are a powerful tool in programming. A loop is a command that allows a segement of code to repeat based on a given condition. A while loop runs while the given condition is true. Let's create a program that has a turtle build a set of stairs along the wall in the image below to the right.
Let's assume that the turtle is already facing the wall where we want to build the stairs. Let's also assume we want to build the stairs to the left of the turtle's location. Below are the steps of our algorithm to build the stairs:
- While there is no block in front of the turtle, move forward one block.
- Once the turtle reaches the wall, turn left.
- Set the current height of the turtle to 1.
- While the height of the turtle is less than 5, repeat steps five through eight.
- Move up one block.
- Place a block from slot 1 below the turtle.
- Move forward one block.
- Increase the current height by 1.
Now that we have written an algorithm for the stairs program, we need to translate it into turtle command blocks. The following image shows the entire stairs program, which we will examine step-by-step.
Step 1: While there is no block in front of the turtle, move forward one block.
This code runs while the block in front of the turtle is air. We use the inspect block command to see if the block in front of the turtle is an air block, which would mean there is nothing in front of the turtle. If the block in front of the turtle is an air block, we run the code in between do and end. The only command within the do and end blocks is a single move forward command.
Step 2: Once the turtle reaches the wall, turn left.
After we exit the while loop, we know we've reached the wall because the while loop will only stop when the block in front of the turtle is not air. That means we can run a turn left command immediately after the while loop.
Step 3: Set the current height of the turtle to 1.
This step creates a variable, which is used to store data. In this case, we are storing the current height of the turtle and assumming the bottom of the wall represents a height of 1. The variable is named "height," but the visual editor only shows the first two letters of a variable name.
Step 4: While the height of the turtle is less than 5, repeat steps five through eight.
In this step, we create another while loop. This one runs while our variable, height, is less than 5. Remember that the do statement indicates the start of a loop's code and the end statement, which isn't shown in this image, represents the end of the loop's code.
Step 5: Move up one block.
This is a simple step that just uses the move up command. Remember that the commands are executed from left to right so it is okay to have multiple commands on the same line.
Step 6: Place a block from slot 1 below the turtle.
The place block command allows you to place a block in front of the turtle (which is the default), below the turtle, or above the turtle. It takes a block from the currently-selected slot, which is slot 1 by default. There is a select slot command that allows you to change the currently-selected slot, but that isn't necessary for this program.
Step 7: Move forward one block.
This is another simple command that simply moves the turtle forward one block in preparation to potentially place another block.
Step 8: Increase the current height by 1.
This command sets the height variable to itself plus one, which essentially increases the variable by one. There are shortcuts for doing this in some programming languages, but in Minecraft you must specify that you are setting a variable to its current value plus one.
After the second while loop ends, the turtle should have created a set of stairs using blocks from its first slot like the one shown below.