
Computer Applications I :: Lessons :: Word Images and Design
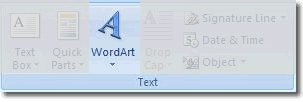
WordArt
WordArt is Microsoft Word's text formatting that allows you to make your text stand out. Technically, WordArt is treated as an image in Word, but you can always change the text by right-clicking on it after it has been created. While you can create your WordArt text after hitting the WordArt button it is usually easier to type the text first.
- Type some text that will be used for your WordArt.
- Highlight the text you typed.
- Go to Insert>Text>WordArt.
- Choose a WordArt style.
- Choose a font style and size.
- Hit "OK" to insert your WordArt.
Since WordArt is treated as an image in Word you will notice you can't move it around once it is added to your document. This is the default behavior for images, but can be easily changed by editing the text wrapping of the WordArt.
- Click on your WordArt.
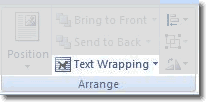
- Go to Format>Arrange>Text Wrapping.
- Choose "Square" text wrapping.
You should now be able to move the WordArt around the screen. This works with a number of items you can insert in Word including images and shapes.
Adding Images
Adding images to Word is easy, and there are a number of ways to do it. You can copy-and-paste an image to insert into Word, but it is often better to save the image you want so you have it later if you need it.
- Find an image on the internet that goes along with your WordArt.
- Download the image and save it to your network drive.
- Go to Insert>Illustrations>Picture.
- In the window that appears choose the picture you downloaded.
- Hit "Insert" to put the image into Word.
If your WordArt disappears you may have had it selected when you chose to insert the image. This replaces the WordArt with the image. You need to make sure nothing is selected when you choose to insert something in Word. Finally, you can use the Format Tab when an image is selected to make changes to it. You can add a border, crop the image, give it a color tint, or make other changes.
Cropping Images
Microsoft Word is not as sophisticated as an image editing program such as Photoshop or Fireworks, but it does include a few tools to make simple changes to your pictures. The Format Tab is the main place to find these tools. One of the tools you can use it the Crop Tool. Cropping an image allows you to cut off the edges of the image, or include a small sub-section of the larger image.
- Select your image in Word.
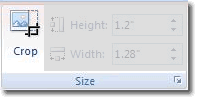
- Go to Format>Size>Crop.
- Drag on the handles to cut off parts of the image.
- Click away from the image to accept the changes.
If you need to undo your crop you will need to use the Undo command. You can also set the size of the image exactly by using the height and width numbers under the Size Sub-Section. Finally, if you hold down "Ctrl" while cropping the width and the height will be cropped evenly.
Flipping and Rotating
Flipping or rotating an image is another common task and Word makes both of these tools easily accessible.
- Select the image you want to flip or rotate.
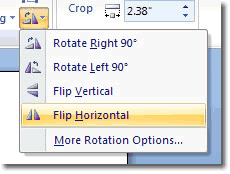
- Go to Format>Arrange>Rotate.
- Choose the flip or rotation option you want.
You can choose More Rotation Options... to rotate or flip an image in increments other than 90º.
Recoloring
You can add a tint to an image, convert it to sepia or black and white, or make a number of other changes to the image's color. A common task is to make a certain color transparent.
- Select the image that will have a transparent color.
- Go to Format>Adjust>Recolor.
- Click on Set Transparent Color.
- Click on the color in the picture to make it transparent.
You can use the Set Transparent Color tool as many times as you want. Sometimes it does not work very well, however. In these instances you will need a more sophisticated image-editing program to add transparency to your image.
Shapes
You can use shapes in Microsoft Word to place behind image, WordArt, or you can use the line shape to put borders in your document.
- Go to Insert>Illustrations>Shapes.
- Choose a shape to place behind your WordArt.
- Click-and-drag to add the shape to your document.
You can use the Format Tab of your shape to add color, a border, or other decorations. Your shape will initially appear in front of your WordArt. To send it behind the WordArt we need to take one more step.
- Go to Format>Arrange>Send to Back.
- Choose "Send Behind Text".
A confusing aspect of WordArt is sometimes it is treated as text while it is treated as an image at other times. When using Send to Back you must use the "Send Behind Text" option to send the shape behind the WordArt.
Line Shapes
The line shape is simply one of the different styles of shapes, but it can also be used for borders in between columns or other blocks of text.
- Go to Insert>Illustrations>Shapes.
- Choose a line under the Lines section.
- Click-and-drag to add the line to your document.
If you hold down the "Shift" key while adding the line it will make sure the line is straight. This tip works in many programs including Adobe Photoshop and Google products. You can make changes to the line using the Format Tab including sending the line behind text and adding color and other designs.
Text Boxes
Text Boxes can be used to hold a small amount of text and separate it from the main body of text. This is often used for quotes, and something known as a pull quote, which is a quote taken from the main body of text.
- Go to Insert>Text>Text Box.
- Choose a style for your Text Box.
- Click-and-drag to add the Text Box to your document.
- Add text by double-clicking on the Text Box and typing.
You can move and format a Text Box in exactly the same way as you can with a shape. You will use a Text Box to hold a pull quote in the Newsletter project.


