
Computer Applications I :: Lessons :: Mail Merge
Setting Up the Data
A mail merge takes data from another program, such as a spreadsheet or database program, and uses the data to create a number of similar documents. A common use in Word is to create form letters, or letters that are very similar but will be sent to a number of different people. To start a mail merge we first need to create the source data.
- Download this spreadsheet and save it to your network drive
If you open the Excel document you will see it looks similar to many of the documents we created during the Excel unit. It contains the names and addresses of a number of people, which we will use to create our form letter.
Inserting Data
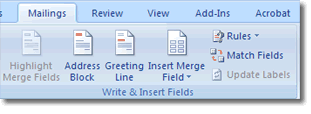
Open a new document in Word and go to the Mailings Tab. This is where all of the tools for creating a mail merge are located.
- Make sure your Excel document is closed.
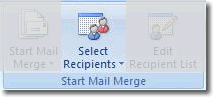
- In Word go to Mailings>Start Mail Merge>Select Recipients
- Select your Excel document.
This will merge the data from Excel with the Word document we are going to make. If you ever need to change the data you can go to Mailings>Start Mail Merge>Edit Recipient List to make changes, or change the Excel document and import it again.
The Write & Insert Fields sub-section is where you can actually insert data. The Address Block adds an address using the name, address, city, and zip code fields. The Greeting Line will add a short greeting using the name and title.
- Add an Address Block to the top of your document.
- Add a Greeting Line below the address block.
- Type a short paragraph for the body of the letter.
Now that you have some text for the body of your letter, let's see how we can add a specific field into the body. Find a place in the body of your letter where you can insert one of the fields. If you don't have a logical place then add another sentence.
- Go to the point where you want to insert a field from the Excel document.
- Go to Mailings>Write & Insert Fields>Insert Merge Field.
- Choose the field you wish to insert.
When you insert a field into Word it will appear with << >> surrounding it so you know it is a merged field. Our last step is to finalize the mail merge document.
Finalizing the Merge
We will now create the mail merge document that will contain all five letters. There will be five letters because there were five people in our data.
- Go to Mailings>Finish>Finish & Merge.
- Choose "Edit Individual Documents...".
Choosing the individual documents option opens a new Word file that contains all of the letters. It is important that you inspect these letters to make sure they look okay and there are no formatting errors. You can always change the mail merge template and finalize it again. For this reason it is a good idea to save the mail merge template as well as the final mail merge document.


